The amount of times I have tired writing this post, is unreal! I don't really know where to start or how much detail I should go in to! So, today I am going to cover some basic elements which should give you a step up in the right direction for better blog photos. If you don't see something covered in this post, that you want to learn more about, do leave a comment and I will see what I can do. Are you ready for a very techy and comprehensive guide to photography?, lets go!
The kit
Obviously you are going to need some sort of photo taking device, and there is many in the world to chose from! That is a given, you don't need me to tell you that! Whether you use a camera phone, point and shoot, Bridge camera or the BIG DADDY of the family, a DSLR. You need to make sure you chose the right one for you, If you are thinking of buying a DSLR, I have made a post about it HERE, which you should check out. Point and shoots and phone cameras, these days can create some stunning photos. For example, I took this very clear and detailed photo, only a couple of weeks ago using my much beloved Olympus, point and shoot in the photo above.
( Taken on a point and shoot)
So how do you get good photographs with a low budget camera? Well there I think there is 3 main things that need to be taken in to consideration. Lighting, composition and background . I am going to break it down in to each section, so I can explain each one, without you getting totally confused.
Lighting
Lighting is one of the most important features of a good photo, because it can make or break a photograph. I obviously took the photo above outdoors because it is a plant, but when doing blog photography this may not always be possible. If you can, taking photos outdoors with natural light is great however I understand living in pretty wet and gloomy countries like the U.K, that is not always possible. When taking photos indoors, you want to be as near to a big window as possible to let the most natural light through. Imagine if you could control the weather? Well you can't but what you can do is control the light by using pieces of equipment like soft boxes or ring lights. I don't have any of these so, I can't offer you much help but just your bog standard Ikea lamp, will work in the exact same way.
Magic Hour
If you want the best lighting for your photos, this will be very helpful if you do lots of fashion photography is magic hour, or golden hour- as it can be called. This is the period shortly after sunrise or before sunset where daylight is redder and softer compared to when the sun is higher in the sky. It can create a really nice effect in your photos
Flash
Flash is something that really should be avoided when taking blog photos, especially if it is indoors. This is because it really does take away the depth of your image, which can leave them looking very flat. Make sure you know how to turn of the flash on your camera. If it a bit dark, try and find a location where there is more light available.
Exposure
Exposure is a fundamental part of lighting in photography. If your image is over exposed, there is too much light coming through. The subject of the image will be hard to see as the image will be white washed. On the flip side, if your image is under exposed, then there is not enough light coming through, making your image very dark and hard to see.
Shutter speed
Shutter speed is how quickly or slowly your camera takes the photo. If you want to create fun light effects like light trails, in the photo below- you need a slow shutter speed ( usually around 1/20 (which is what I used for the photo below, but this will depend on how much light there is) . However you want to capture something moving fast, like in sport photography- you need a fast shutter speed. ( around 1/500 but it depends on how fast the object is moving and the effect you want to create) I normally use a shutter speed between 50-100, when taking blog photos.
ISO
ISO, is your camera sensitivity to light. If you have a high ISO, the more light will get in to the photo whereas if you have a lower ISO, there image will be darker and have more shadows. If you have a high ISO, then there is the greater chance that your image will be over exposed but if you have a low ISO, the chances are ( yep you guessed it!) Your image will be under exposed. I usually shot my photos with the ISO of 100, but will adjust this depending on how much natural light is coming through the window.
Composition
Yay Composition, is one of my favourite parts of photography ( That makes me sound real sad, I know) Composition is what makes a photo stand out from the rest. Have you ever looked a photo and thought it was really good, but can quite pin point why? Well its probably because they are using one or more of the following rules.
Angles
One of the most simple but effective ways to take a good photograph is angles. For example, the photo I took of the flower, is taken from looking up at it, This makes it seem a lot more interesting, than if you were taking it from a normal straight on point of view. Birds eye view is also very important, I often find myself on my tip toes taking pictures for my blog, like in the photo below.
Fill the Frame
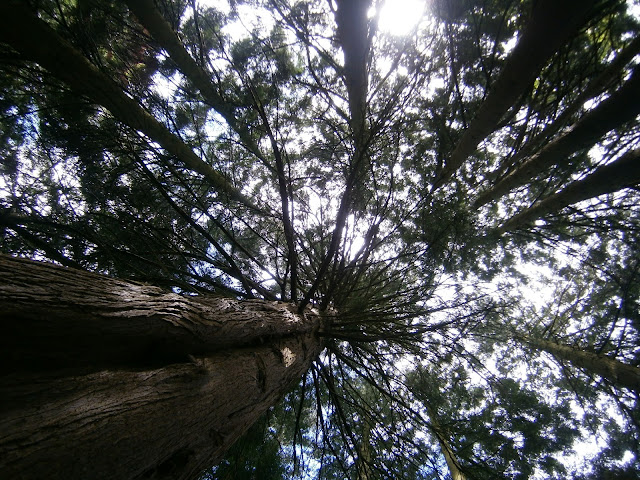
Its really as simple as it sounds! By taking a photo, like the one of trees below, I have positioned the camera, so I am looking through the trees to the landscape behind. The trees are dark and go the way around the outside of the photograph, so you become automatically drawn in to the center of the photo.
Rule of thirds
This can be quite tricky to get your head around if you are unsure, but it truly does help create better photos. Have you ever seen those grids appear on your camera screen? Well they are there to help you use the rule of thirds.
The idea is that your main point of focus or subject is placed on one of the thirds of the grid- indicated by the red circles. This creates a very pleasing to the eye photograph.
Leading Lines
Another simple but effective way to create better photos. Leading lines, are simply just lines that lead you in to the photograph. They should start from the bottom of the frame and guide the eye inwards or upwards to the subject.
Background
We are on to the final step, Background! Popular with many beauty bloggers is white and marble backgrounds. This is because they are simple, clean and non distracting from the main focus of the image. A cluttered background is distracting and creates noise in the photo, so you don't know where to look. Backgrounds don't have to be plain white or a solid colour but you should be able to distinguish between the background the subject. And we don't want to see any dirty laundry.
Aperture
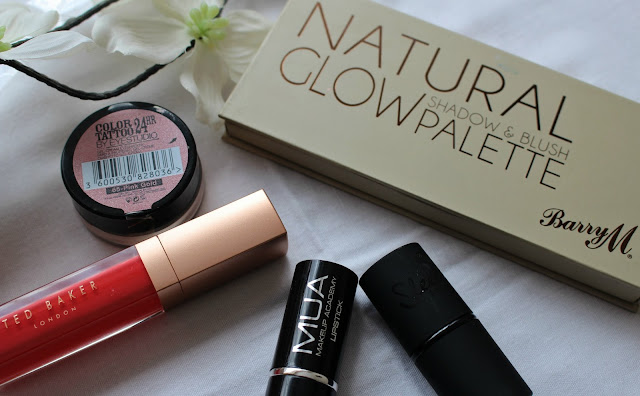
Ever seen a photograph with a really nice blurry background? Well that is down to aperture. Aperture is the hole in your camera, where the light comes through. The smaller the number, the larger the hole ( around F1.4) F stands for F stop by the way. Or if you have higher F stop, the smaller the hole. The smaller the F stop, the more blurred background. The Aperture, controls the depth of filed. This is the distance between the subject in focus and the background out of focus. This is important as it means that the subject is more likely to catch your eye then a blurry background. A prime lens of 50mm, will create the blurry background as well. I took the photo below with a F stop of 5. So not actually that low, but it still does create a new blurry background. If you have aperture priority mode on your camera, I definitely recommend using that or if you don't I used to use macro settings on my point and shoot and it works in the same way.
Thats it! Phew!
I don't expect anyone to actually to read all of it, but hopefully you may have picked up a couple of useful tips and have something to refer to when you get stuck. If you have any more questions, you can ask them in the comments x


